

Puzzled by the practice puzzle? Here's a step-by-step guide to solving it.
We'll start, as always, with a blank grid. All the pictures on this page are just pictures, so clicking on them won't do anything. Make sure you've read the tutorial and the example if you're not sure what's going on here.
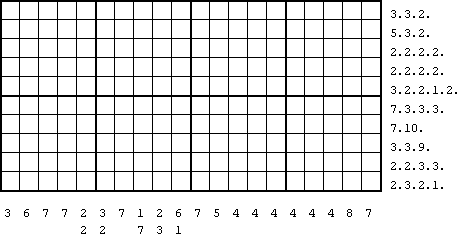
It doesn't really matter whether you start with the rows or with the columns, but because the column clues look simpler, and because we can immediately see that the 7s and 8s are going to give us easy overlaps, we'll start with the columns.
Because the grid is 10 squares high (two sets of 5), we know that any clue bigger than a 5 will give us an overlap.
So all those 6s, 7s and 8s give us solid squares.
There's also the 1.7 and the 6.1, which give us asymmetric overlaps (the overlap isn't the same
above and below the centre line). After looking at each of the columns, the grid now looks like this, where the squares
are highlighted to show that they've changed.
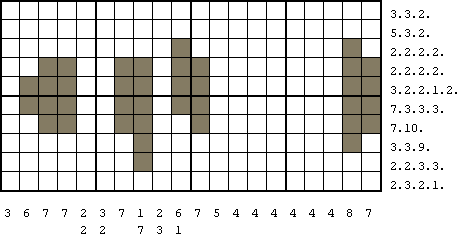
Right. Looking at the fourth row, the clue is 2.2.2.2 and we've already got four groups of two filled in.
So we can fill in the rest of the row with dots and claim our first complete row! We can't quite tell where the 1
sits in the fifth row, but we can complete the sixth because that's the only way those blocks will fit in now. We can also
fill in lots of squares for the 10 and the 9 in the 7th and 8th rows.
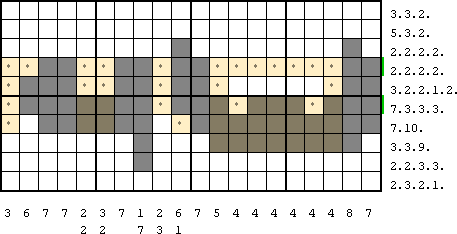
Columns again. That dot in the second column forces the position of the 6, so we can complete the whole column now.
We can also finish column 6, because there isn't room for those solids to part of the 3 and still leave room for a
2 below it. So they must be the 2, and the 3 must be up at the top.
We can also fill in lots of dots in columns 12 to 18 because the single blocks of solids are all lower down.
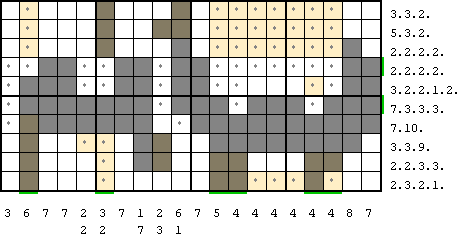
Looking at the first row again, we can see a dot in the second position. This means that the two solids we've found in this
first row must belong to the first 3 and the second 3 respectively (without this dot, we wouldn't be able
to tell anything yet). Given this, we can fill in the 2 in the right-hand gap, and calculate the overlaps with the
3s. We can also fill in the second and third rows in the same way.
In the 9th and 10th rows we can put in dots separating the blocks, and also use the overlap to find the missing 3
on the last row.
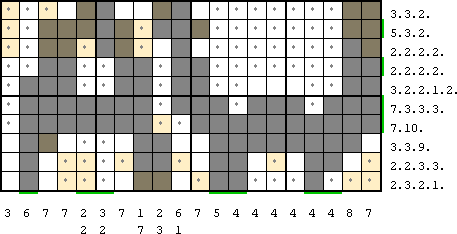
Back with the columns, we have now found our 3 in column 1, and also the 1 in column 8.
We can also finish off several of the other columns.
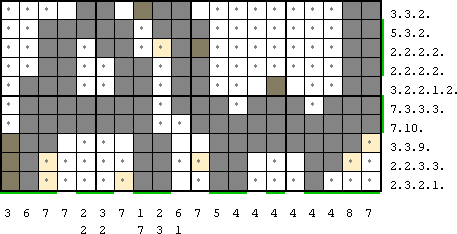
Nearly there. There's just 5 rows not yet completed (see the green bars on the edge of the grid for guidance), and we can now finish off them all. Just a few more clicks using the maximum ranges and minimum ranges, and the puzzle is complete.
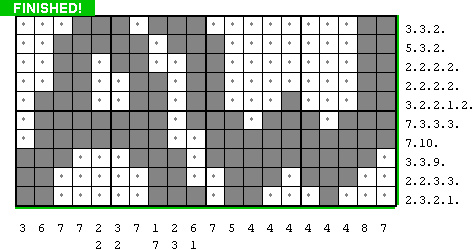
I knew you'd ask that. It's "AW", as in "ActivityWorkshop".
So, if you understand all of that, you can have a go at the practice puzzle yourself, or go onto puzzle 1. Or, you can refresh the basics in the tutorial.