
Arduino has been the name for maker projects with electronics for a long time before the Raspberry Pi came along. For me it always had the aura of basic complexity, being difficult to use, difficult to see what it was doing, and difficult to debug. But it seems I was completely wrong.
There are lots of different Arduino models available, of vastly different sizes and applications. Some are boards as big as or even bigger than the Raspberry Pi, which can be expanded with stackable "shields" for additional capabilities. Some are tiny, like the Nano discussed here or the Teensy, and some are even smaller still, such as the Lilypad, more intended for wearable applications.

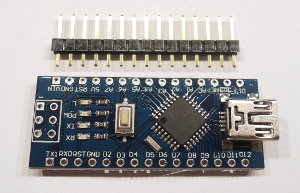
This picture shows how the board arrives, it's a Nano with a micro USB socket, and in this variation it comes even without the pin rails soldered on (one of which is shown separately above). In fact this one isn't even an Arduino, it's a cheap Nano clone from China which I bought from eBay for under 4 Euros. Note that it's perfectly legal to make and sell and buy clones of Arduinos, because the designs are open. You just can't refer to them as Arduinos, but they function in exactly the same way because the design and the components are the same.
This one is based on an Atmel ATMega328 chip, and has several digital input/outputs like the Pi, but also analog inputs. And interestingly it's got 32 kilobytes of memory on board, obviously a different league from the Pi's 512 Megabytes (or 1 Gigabyte for the new ones), but eerily similar to the 32 KB of RAM that my first ever home computer had.
OK, so you can't just plug it into a tv and open up an interactive python shell to experiment with the GPIO pins, as you can do on the Pi. With a little board like this you just haven't got HDMI output and USB keyboards. Or python. In fact, it's a lot closer to the Attiny chip we played with in the Digg button project, it's a microcontroller which just runs simple programs which you can flash onto it.

The huge difference is that these Arduino boards come with a USB socket, through which you can send your programs (and power), and they come with a beautiful (and free) development tool which makes programming it a breeze. With the digg button we had to wrestle with a cross-compiler and calling avrdude from the command line. With this IDE, you just need to select which Arduino you have, and press 'Go'. It does call gcc and avrdude behind the scenes, but the developers have managed to make this so easy to use it's amazing.
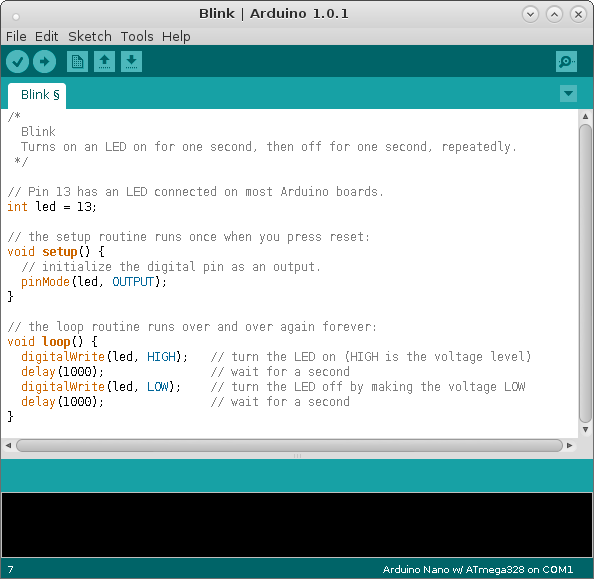
This IDE is very easy to install (on linux, just do aptitude install arduino and everything is done for you), and appears as shown on the right. It comes already prepared with numerous code examples, such as this simple "blinking LED" example shown here. And to make it even easier for you, there is already an LED mounted onto the board and connected up to pin 13. So even with just a USB cable you can have your first program running within minutes of unpacking it.
Simple things with LEDs and buttons can be done in the same way as on the Pi, just without the interactive python shell. But we can quickly react to button presses, keep counters and change LED states in the same way. Pins can be configured with a single line to be outputs, or inputs, or inputs with a pull-up resistor - super easy.
Hopefully further projects will follow, adapting python code and hooking up to some different electronics modules such as an RF receiver board.