
"Via Ferrata" sounds a bit Latin, but don't worry. It's "via" like in "Via Alpina" or viaduct (meaning "way") and "ferrata" like in ferrous, or ferric (meaning "iron"). So it's just the Italian way of saying "Iron way". Although in German it's usually called a "Klettersteig" (climbing path).
And what on earth does that mean? There's a good overview at wikipedia:Via_Ferrata. It's definitely a step up from hiking, because there are real exposed bits and safety cables, and you definitely need equipment. But it's not real climbing, because you don't use any ropes, and you don't wear those tight climbing shoes to force your toes into cracks in the rocks. Instead, there are fixed, permanent safety cables, which you clip onto and slide along, and there are those "iron" elements, like fixed ladders, staircases, footpegs and handrails.
Obviously there are many routes with wildly differing levels of difficulty, so you can find bits which are really tame, and other bits which are much more challenging. As always, work within your limits!
Most important is the harness, which attaches securely round the waist and around the thighs. It's important to make sure this fits properly (and comfortably!), as this is what your safety will rely on if something happens.
Secondly you need a Via Ferrata "set", which attaches to the harness. This has two straps on it with two carabiners, and it's these carabiners which you will clip onto the safety cables (many times!). In a little pouch is an arresting mechanism which if you should fall will expand and tear apart, absorbing some of the shock of the fall. Let's hope you don't get to try this out.
Thirdly, a helmet - this is fairly simple and light, and is useful for protecting against light knocks from accidental encounters with the rock wall or the iron elements, maybe even small falling stones.
If you don't have this equipment, you can rent it pretty easily at sports shops. Either pick it up from the resort before you go, or rent it from your home city and take it with you. We used Bächli sport which had friendly service, but we ran into time pressure because we only rented for one day (picking it up the evening before) and we struggled to get the equipment back before the store closed on the Saturday evening. The cost was CHF 30 per set for all three items.
Some people recommend the use of thin (but robust) gloves to reduce scratching of hands, but this depends on the route - for our easy route we didn't have to use our hands on the rocks so it wasn't an issue.
There are a few ways to get started, one of which would be to hire a professional guide to lead your group. On the route we took, a guide would have cost us CHF 150 per person (including equipment hire).
Another way is to start off in an "adventure park"-style environment, as the equipment and the safety precautions are more or less identical. There are countless examples of such parks, for example we were impressed with the XP Park in Pitztal, by Go Ape in Britain, and also Gründenmoos in St Gallen. Many of these offer an expert introduction to how to use the equipment, and routes of different difficulty levels. In a park like this you can ask questions, call for help and build up confidence in a safe environment.
To do an actual Via Ferrata, it's not a big step up from there, as long as you do some research about which routes are suitable for beginners. Wikipedia lists 5 difficulty levels from A to E, so as long as you stick to routes which are mostly A with a bit of B, and take note of the length of the route and the altitude difference (so you don't overstretch), you can take what you learnt in the park out onto the real mountains. It might help to take someone along who's done a Via Ferrata before, and I'd recommend to keep it to a small group too.
Of course you'll need equipment, but this you can easily rent either when you get there or from your local sports shop.
We chose a route which is suitable for beginners, so it's mostly at just the easiest level of difficulty. It's also not too long compared to other ones — it took us around 2 hours 15 minutes for the climb part, or around 5 hours total including the long hike down again.
It's called "Pinut" (we never did figure out how it got that name), and is just northeast of Flims Dorf. More information about the route can be found at flimslaax.com and there's a little bit in the German wikipedia.
There are a few parking spaces at N 46°50.5', E 9°18.7', from where a marked hiking path leads up to the start at N 46°50.745', E 9°18.436'. From the exit at N 46°50.935', E 9°18.184', the hiking path leads further uphill, before descending around 900 m through Bargis and back to the bus stop at Fidaz.
Well OK, just a few. Just to give you an idea.
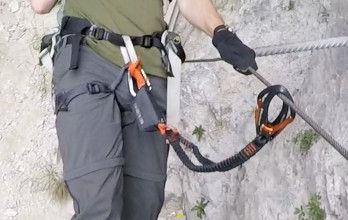
Harness, carabiners, arrester pouch and optional gloves.
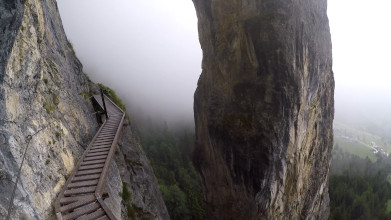
Metal walkway along the cliff.
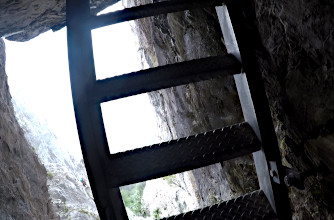
Dark ladder between sheer faces.
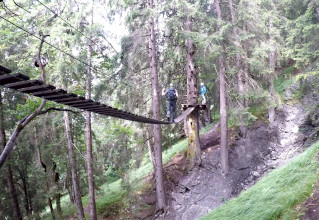
Wobbly wooden walkway, more like a Seilgarten.
There are some introductory tips for beginners at redbull.com, and if you're interested in having a go in Switzerland there's a short list of suitable places at myswitzerland.com.